Generating Videos
This guide uses Veo Fast for text-to-video and Seedance for image-to-video. You can swap the job type to use any of these video generation models:
- Wan 2.2 Lightning —
inference.wan2-2.lightning.txt2vid.v0andimg2vid(fast, ~22s) - Wan 2.7 —
inference.wan2-7.txt2vid.v1and more (1080p, up to 15s, audio-driven) - Veo —
inference.veo.fast.txt2vid.v2and more (with audio generation) - Kling —
inference.kling.txt2vid.v1(camera control, motion masks) - Seedance —
inference.seedance.proturbo.txt2vid.v1andimg2vid(1080p, ~45s, async-only)
Project Setup
Section titled “Project Setup”# Create a project directory.mkdir prodia-video-generationcd prodia-video-generationInstall Node (if not already installed):
brew install node# Close the current terminal and open a new one so that node is available.apt install node# Close the current terminal and open a new one so that node is available.winget install -e --id OpenJS.NodeJS.LTS# Close the current terminal and open a new one so that node is available.Create project skeleton:
# Requires node --version >= 18# Initialize the project with npm.npm init -y
# Install the prodia-js library.npm install prodia --save
Install Python (if not already installed):
brew install python# Close the current terminal and open a new one so that python is available.apt install python3 python3-venv python-is-python3# Close the current terminal and open a new one so that python is available.winget install -e --id Python.Python.3.12# Close the current terminal and open a new one so that python is available.# Requires python --version >= 3.12python -m venv venvsource venv/bin/activatepip install requestsInstall curl (if not already installed):
brew install curl# Close the current terminal and open a new one so that curl is available.apt install curl# Close the current terminal and open a new one so that curl is available.# NOTE: Windows 10 and up have curl installed by default and this can be# skipped.winget install -e --id cURL.cURL# Close the current terminal and open a new one so that curl is available.# Export your token so it can be used by the main code.export PRODIA_TOKEN=your-token-hereYour token is exported to an environment variable. If you close or switch your
shell you’ll need to run export PRODIA_TOKEN=your-token-here again.
Create a main file for your project:
const { createProdia } = require("prodia/v2");
const prodia = createProdia({    token: process.env.PRODIA_TOKEN // get it from environment});
Create the following main.py
from requests.adapters import HTTPAdapter, Retryimport osimport requestsimport sys

prodia_token = os.getenv('PRODIA_TOKEN')prodia_url = 'https://inference.prodia.com/v2/job'
session = requests.Session()retries = Retry(allowed_methods=None, status_forcelist=Retry.RETRY_AFTER_STATUS_CODES)session.mount('http://', HTTPAdapter(max_retries=retries))session.mount('https://', HTTPAdapter(max_retries=retries))session.headers.update({'Authorization': f"Bearer {prodia_token}"})set -euo pipefailYou’re now ready to make some API calls!
With a Prompt
Section titled “With a Prompt”const { createProdia } = require("prodia/v2");const fs = require("node:fs/promises"); // add this to imports at the top
const prodia = createProdia({ token: process.env.PRODIA_TOKEN, // get it from environment});
(async () => { const job = await prodia.job({ type: "inference.veo.fast.txt2vid.v1", config: { prompt: "A sweeping mountain landscape at sunrise, captured from a high-angle perspective using a wide-angle lens. The early morning light casts long shadows across the rugged terrain, with mist rolling over the valleys. The scene features sharp detail in the rocks, lush greenery, and clouds forming over distant peaks. Warm oranges and pinks dominate the sky, creating a dramatic and serene atmosphere. High dynamic range (HDR) captures the subtle transitions between light and shadow.", }, });
const video = await job.arrayBuffer();
await fs.writeFile("landscape.mp4", new Uint8Array(video));})();node main.jsfrom requests.adapters import HTTPAdapter, Retryimport osimport requestsimport sys
prodia_token = os.getenv('PRODIA_TOKEN')prodia_url = 'https://inference.prodia.com/v2/job'
session = requests.Session()retries = Retry(status_forcelist=Retry.RETRY_AFTER_STATUS_CODES)session.mount('http://', HTTPAdapter(max_retries=retries))session.mount('https://', HTTPAdapter(max_retries=retries))session.headers.update({'Authorization': f"Bearer {prodia_token}"})
headers = { 'Accept': 'video/mp4',}
job = { 'type': 'inference.veo.fast.txt2vid.v1', 'config': { 'prompt': 'A sweeping mountain landscape at sunrise, captured from a high-angle perspective using a wide-angle lens. The early morning light casts long shadows across the rugged terrain, with mist rolling over the valleys. The scene features sharp detail in the rocks, lush greenery, and clouds forming over distant peaks. Warm oranges and pinks dominate the sky, creating a dramatic and serene atmosphere. High dynamic range (HDR) captures the subtle transitions between light and shadow.', },}
res = session.post(prodia_url, headers=headers, json=job)print(f"Request ID: {res.headers['x-request-id']}")print(f"Status: {res.status_code}")
if res.status_code != 200: print(res.text) sys.exit(1)
with open('landscape.mp4', 'wb') as f: f.write(res.content)python main.pyset -euo pipefail
job=$(cat <<EOF{ "type": "inference.veo.fast.txt2vid.v1", "config": { "prompt": "A sweeping mountain landscape at sunrise, captured from a high-angle perspective using a wide-angle lens. The early morning light casts long shadows across the rugged terrain, with mist rolling over the valleys. The scene features sharp detail in the rocks, lush greenery, and clouds forming over distant peaks. Warm oranges and pinks dominate the sky, creating a dramatic and serene atmosphere. High dynamic range (HDR) captures the subtle transitions between light and shadow." }}EOF)
curl -sSf \ -H "Authorization: Bearer $PRODIA_TOKEN" \ -H 'Accept: video/mp4' \ --json "$job" \ --output landscape.mp4 \ --retry 3 \ https://inference.prodia.com/v2/jobbash main.shopen landscape.mp4xdg-open landscape.mp4start landscape.mp4From an Image
Section titled “From an Image”Let’s extend our example and generate a video from an existing image.
const { createProdia } = require("prodia/v2");const fs = require("node:fs/promises"); // add this to imports at the top
const prodia = createProdia({  token: process.env.PRODIA_TOKEN, // get it from environment});
(async () => {  // get input image  const inputBuffer = await (await fetch("https://docs.prodia.com/strike-a-pose.jpg")).arrayBuffer();
  const job = await prodia.job({    type: "inference.veo.fast.img2vid.v1",    config: {      prompt: "Walking down the street.",    },  }, {    inputs: [ inputBuffer ]  });
  const video = await job.arrayBuffer();
await fs.writeFile("walking.mp4", new Uint8Array(video));})();node main.jsfrom requests.adapters import HTTPAdapter, Retryfrom io import BytesIOimport jsonimport osimport requestsimport sys
prodia_token = os.getenv('PRODIA_TOKEN')prodia_url = 'https://inference.prodia.com/v2/job'
session = requests.Session()retries = Retry(status_forcelist=Retry.RETRY_AFTER_STATUS_CODES)session.mount('http://', HTTPAdapter(max_retries=retries))session.mount('https://', HTTPAdapter(max_retries=retries))session.headers.update({'Authorization': f"Bearer {prodia_token}"})
try: with open('strike-a-pose.jpg', 'rb') as f: input_image = f.read()except FileNotFoundError: res = requests.get('https://docs.prodia.com/strike-a-pose.jpg') input_image = BytesIO(res.content) with open('strike-a-pose.jpg', 'wb') as f: f.write(res.content)except Exception as e: raise e
headers = { 'Accept': 'video/mp4',}
job = { 'type': 'inference.veo.fast.img2vid.v1', 'config': { 'prompt': 'Walking down the street.', },}
files = [ ('job', ('job.json', BytesIO(json.dumps(job).encode('utf-8')), 'application/json')), ('input', ('strike-a-pose.jpg', input_image, 'image/jpeg')),]
res = session.post(prodia_url, headers=headers, files=files)print(f"Request ID: {res.headers['x-request-id']}")print(f"Status: {res.status_code}")
if res.status_code != 200: print(res.text) sys.exit(1)
with open('walking.mp4', 'wb') as f: f.write(res.content)python main.pyset -euo pipefail
cat <<EOF > job.json{ "type": "inference.veo.fast.img2vid.v1", "config": { "prompt": "Walking down the street." }}EOF
if [[ ! -f strike-a-pose.jpg ]]; then curl -Lo strike-a-pose.jpg 'https://docs.prodia.com/strike-a-pose.jpg'fi
curl -sSf \ -H "Authorization: Bearer $PRODIA_TOKEN" \ -H 'Accept: video/mp4' \ --output walking.mp4 \ --retry 3 \ https://inference.prodia.com/v2/jobbash main.shopen walking.mp4xdg-open walking.mp4start walking.mp4With Audio
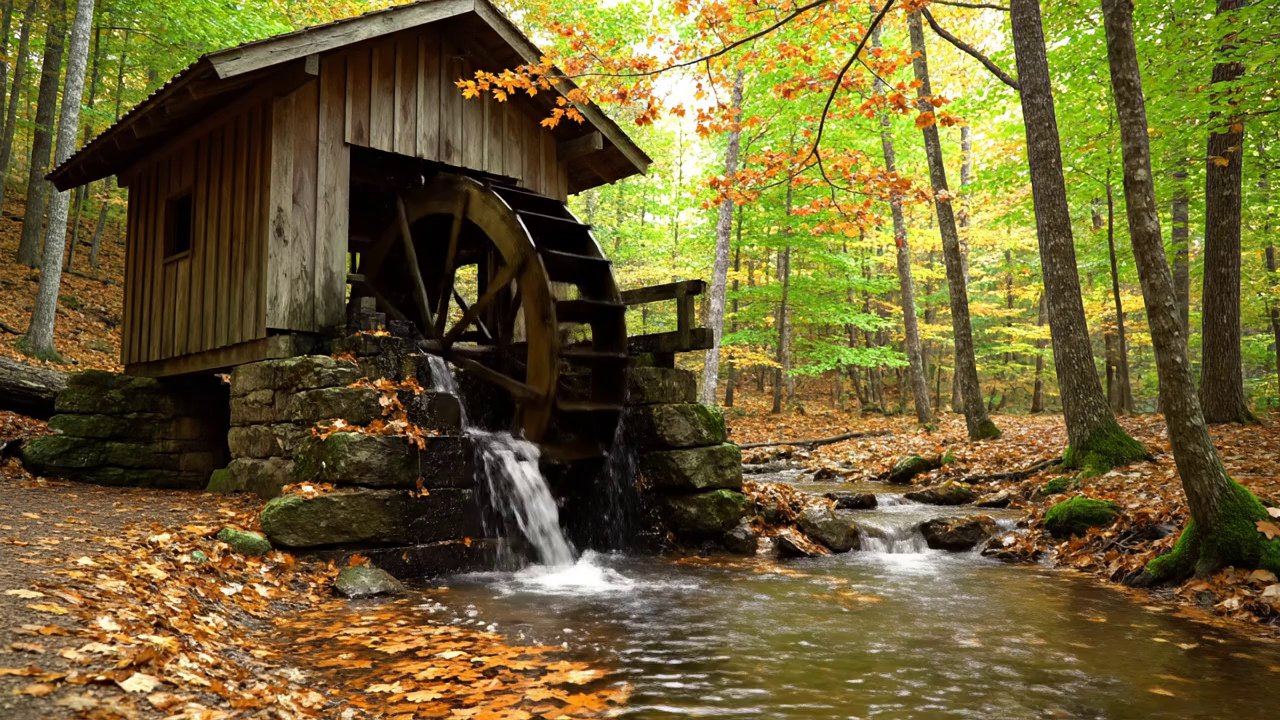
Section titled “With Audio”Veo can generate a synchronized audio track alongside the video — water, footsteps,
ambient sound, dialogue with lip sync — in a single job. Set generate_audio: true
and describe the soundscape in your prompt.
const { createProdia } = require("prodia/v2");const fs = require("node:fs/promises"); // add this to imports at the top
const prodia = createProdia({  token: process.env.PRODIA_TOKEN, // get it from environment});
(async () => {  const job = await prodia.job({    type: "inference.veo.fast.txt2vid.v2",    config: {      prompt: "A wooden water mill in a forest stream, water splashing on the wheel, leaves rustling, peaceful afternoon, cinematic HDR",      negative_prompt: "low quality, blurry, watermark",      resolution: "720p",      aspect_ratio: "16:9",      duration_seconds: 4,      generate_audio: true,    },  });
  const video = await job.arrayBuffer();
await fs.writeFile("watermill.mp4", new Uint8Array(video));})();node main.jsfrom requests.adapters import HTTPAdapter, Retryimport osimport requestsimport sys
prodia_token = os.getenv('PRODIA_TOKEN')prodia_url = 'https://inference.prodia.com/v2/job'
session = requests.Session()retries = Retry(status_forcelist=Retry.RETRY_AFTER_STATUS_CODES)session.mount('http://', HTTPAdapter(max_retries=retries))session.mount('https://', HTTPAdapter(max_retries=retries))session.headers.update({'Authorization': f"Bearer {prodia_token}"})
headers = { 'Accept': 'video/mp4',}
job = { 'type': 'inference.veo.fast.txt2vid.v2', 'config': { 'prompt': 'A wooden water mill in a forest stream, water splashing on the wheel, leaves rustling, peaceful afternoon, cinematic HDR', 'negative_prompt': 'low quality, blurry, watermark', 'resolution': '720p', 'aspect_ratio': '16:9', 'duration_seconds': 4, 'generate_audio': True, },}
res = session.post(prodia_url, headers=headers, json=job)print(f"Request ID: {res.headers['x-request-id']}")print(f"Status: {res.status_code}")
if res.status_code != 200: print(res.text) sys.exit(1)
with open('watermill.mp4', 'wb') as f: f.write(res.content)python main.pyset -euo pipefail
job=$(cat <<EOF{ "type": "inference.veo.fast.txt2vid.v2", "config": { "prompt": "A wooden water mill in a forest stream, water splashing on the wheel, leaves rustling, peaceful afternoon, cinematic HDR", "negative_prompt": "low quality, blurry, watermark", "resolution": "720p", "aspect_ratio": "16:9", "duration_seconds": 4, "generate_audio": true }}EOF)
curl -sSf \ -H "Authorization: Bearer $PRODIA_TOKEN" \ -H 'Accept: video/mp4' \ --json "$job" \ --output watermill.mp4 \ --retry 3 \ https://inference.prodia.com/v2/jobbash main.shopen watermill.mp4xdg-open watermill.mp4start watermill.mp4The output is a 4-second 720p MP4 with both video (H.264) and audio (AAC) tracks — play it with sound on to hear the splashing water and rustling leaves the model generated alongside the imagery.